In [0]:
%run ../lib1/pkg1/Blaher
In [0]:
%run ../lib1/pkg1/MultiBlaher
In [0]:
%run ../lib1/pkg2/mod3
In [0]:
%run ../lib1/pkg2/mod4

In this post we’ll be looking at why you may want to consider alternatives to databricks notebooks for development and what it means for teams starting out on the unified analytics platform. We’ll go through some of the common areas of difficulty with notebook development on databricks and how they compare with using an IDE. This post is based on my own experiences of implementing projects with clients on the platform, and as such should be taken as my own opinion on the matter. Something hopefully to take on board for consideration rather than dogma, mantra, gospel or any other theologically aligned thinking on the matter. Ultimately things depend on your own needs and circumstances, and hopefully this article will help with awareness of other ways of working.
If you’ve done any development on databricks you’ve probably used databricks notebooks. They are the first point of call for many of us working with data on the platform. Very popular with Data Scientists in particular, they provide an environment whereby data transformation, wrangling, munging or whatever your preferred terms for generally ‘doing stuff’ with data, and visualising the results, is readily accessible. There is no software to install, no real configuration and a generally gentle learning curve to getting working. The team can easily collaborate by creating their notebooks in workspaces and progress on their data journeys unhindered. Based on Jupyter notebooks, they offer great functionality and compatibility with a well established platform widely in use across Data Science teams. For some ways of working, such as data exploration, quick analysis exercises and so forth they are very appealing. Many very mature data teams never really leave the notebook environment, finding all they need in this native offering.
Another popular use for notebooks is to quickly ‘proof out’ something before moving onto more in-depth development work. The ease with which you can execute and visualise results makes databricks notebooks ideal for these rapid turn-around development tasks.
Before I find myself cast as the pantomime villain, just to be clear, there is absolutely nothing ‘bad’ about development with just notebooks, after all they are perfectly capable of implementing code across all aspects of the databricks analytics platform. They were however, at least as far as I can tell, not really intended to serve as fully fledged complex development environments.
As many teams have discovered, when you get into the more involved data engineering activities, working with code that would benefit from improved structuring, visibility and reuse for example, you may find yourself wanting to revisit this development approach. From what we’ve experienced, there is a definite tipping point beyond which working in this fashion has considerable impact on developer productivity in these settings. When trying to exercise any of the well established modern development practices that are second nature to most developers, such as breaking down the code into encapsulated modules, refactoring elements of the code, and writing unit tests to accompany your code, notebooks-based development poses a lot of challenges. Any of these aspects of development that are taken for granted in a respectable Integrated Development Environment (IDE) are not readily available to your notebook endeavours. As things progress further you’ll inevitably find maintaining and expanding on your efforts to be increasingly difficult and productivity is likely to suffer considerably as a result.
Okay, enough doom mongering for one lifetime. The simple solution when you’re struggling with one tool is of course to change to one better suited for the job at hand. For complex data engineering or analytical developments on databricks, this means pretty much the same as with any substantial code effort. Using an IDE.

Whenever we see clients that are set on the attractive simplicities of notebook-based development, we always make them aware of the alternative ways of working that IDEs offer. This allows them to best understand the overheads and feasibility of each approach and make informed decision as to which will best suit their needs. After all, in the short term notebook-based development may be fine, but looking to what will be required as time and demands progress to the next level of development complexity is what will determine the best approach.
Here’s some of the development experiences that have a noticeable difference across the two ways of working.
In Python, Scala, Java and just about any other language you’ll be used to structuring your code into libraries, packages and modules or their equivalents, with best practices for how to structure the files. You’ll be familiar with distribution of these logical units and referencing from within your code using import statements. Navigating your code in the IDE is straight forward, structured into projects, and assisted with search and ‘Go To Definition’ functionality for all your code. You can quickly bounce around from one block of code to another in another file somewhere like an over-caffeinated tech-evangelist tipsy on the latest coolaid.
As part of encapsulating your development code, you may have created various databricks notebooks, perhaps grouping up functions and classes like in standard modules in Python. You might even put these in a hierarchy of folder in order to structure them better, like you would do with Python packages and modules. This does of course help prevent duplication of code and aid with understanding and reuse and should help make your notebook-based development easier to manage.
Note however that you won’t have a true Library\Package\Module hierarchy, as the folder structure doesn’t enforce any concept of scope to your code definitions. Any functions or classes that are defined in one notebook will clash with same named definitions in other notebooks regardless of folder structure, unlike how Python or Scala code is structured.
The notebook navigation experience in the workspace isn’t the best however, and you’ll find yourself opening a lot of tabs to navigate between different notebooks as you refer to various elements of your code. The UI isn’t really intended for too much to-ing and -fro-ing between notebooks, preferring a more ‘all in one place’ way of working. You may start to get a little dizzy as you find your way around the various browser tabs of your code.
Not much to say here really, you structure your code into projects, packages and modules and add the respective import statements. If you want to refactor files, move things around or whatever, the IDE generally takes care of ensuring that everything still lines up nicely.
In order to make use of your nicely structured notebook development, you’ll need to make sure it has been loaded into your spark session, by running the required notebooks on which your databricks code depends. You’ll soon find yourself having to maintain rather ugly notebooks that are wrappers for calling all these required other notebooks, with lots of %run magic statements such as the ‘run_all’ notebook below:
%run ../lib1/pkg1/Blaher
%run ../lib1/pkg1/MultiBlaher
%run ../lib1/pkg2/mod3
%run ../lib1/pkg2/mod4
and then make sure that you call this notebook wherever you need to make use of the code, as shown with the Python code below:
%run ../lib1/run_all
# give me a 'blah'
bl = Blaher()
print(bl.add_blah('just say '))

# give me another 5 'blah's
mbl = MultiBlaher()
print(mbl.add_blah_multi('and then say ', 5))
# found in lib1/pkg2/mod3
print(hello_world())

# found in lib1/pkg2/mod4
print(adieu_mon_ami('Nigel'))
This can introduce some development pains. Neglecting to add the required %run statements for loading the new elements of code is easily done, resulting in calls to undefined code. Additionally, should you decide to restructure your code through some attempts at refactoring you’ll find yourself having to rehash a load of paths in these wrappers. It is easy to introduce bugs and harder to improve your code as a result, both of which will impact your notebooks development productivity.
In both databricks notebooks and IDE projects development you can of course reference libraries in the standard fashion for the language in question. Again we use an import statement approach, ensuring that the libraries in question are made available on the cluster executing the code or within the session in question.
I’ll talk later in the series on different ways of making these libraries available to your executing code, as there are some differences around managing the impact of updates to the libraries.
Every modern IDE has some degree of integration with unit testing frameworks built in, either in the core product or through various plugins/extensions. You can often right-click on an element of your code and ‘Generate Unit Tests’ in order to quickly sketch out some tests and get started on ensuring things actually work. You may be following Test-Driven Development (TDD) and working very tightly between code and validation/verification, and your IDE will try to make this a generally happy experience for all involved. Executing your tests either in isolation or as part of a suite is simple, efficient and transparent. You can find out more on IDE testing functionality for PyCharm here, JetBrains IDEA Scala here, and for Visual Studio Code python testing here. I’ll be going into testing in a number of later posts in the series.
In notebooks development on databricks you’ll be preferably grouping suites into the same notebook and then executing either the whole notebook or individual cells in the case of specific test cases, and don’t have this functionality available. You can of course reference unit testing frameworks such as PyTest or ScalaTest and crack on with implementing tests, but the ease with which you can exercise and get feedback on these is limited. Depending on how much you embrace testing as part of your work (and the general advise is to make it at least a big enough part to avoid embarrassment or the QA firing squad) you will find this may have a real impact.
In the IDE world of course we have nice debuggers that allow stepping through, over, around, behind your code like Donnie Yen in an Ip Man movie when you need to figure out why your code has coughed up the odd fur ball. Variables are available for inspection that point you happily along the way to bug squishing and all is happy once more. These tools are pretty indispensable and you soon see why.
In databricks notebooks you run your cell, check the results and hopefully it did what you expected or if not and you’re lucky it is obvious where the development went belly up. However, there are times when you really really need to see what is happening on each line, and where that bug is creeping in. Not being able to step into your code leaves you splattering your notebook development efforts with print() statements and the like in an attempt to play hunt the gremlin. Then at some point when you find the foible you then go back and remove all those print() splatters and finally get back to coding. Not great.
I won’t go into all the other advantages of using an IDE as we’ve all got better things to be doing. Suffice to say IDEs such as PyCharm, Intellij IDEA, VS Code and the like are generally crammed with a trove of productivity enhancing tools and functionality that will make your development a different league. With the community editions having such fantastic features you won’t need to shell out a penny, though for some the non-gratis editions may of course have somethings additional to offer worth the price tag.
Here’s a quick summary of the above points:
Functionality | IDE | Notebook |
|---|---|---|
Data Visualisation | ||
Rapid Prototyping | ||
Ad-hoc Analysis and Exploration | ||
Code Structure and Navigation | ||
Referencing Your Code | ||
Testing | ||
Debugging | ||
Code Editing Productivity |
No-one said it has to be either/or of course. For many teams, the IDE is the tool of choice for the more complex library code development, with the productivity gains that IDEs offer. The notebook is there to tap in to these libraries, providing a development interface for further manipulating, exploring and visualising the resultant datasets. Each approach plays to its strengths.
What to do if you’ve dived in and have a whole slew of notebooks that are your backbone of your data integration and analytics efforts and are struggling with the development experience? Do not despair! It doesn’t have to descend into a frustrating, opaque, unmanageable quagmire of notebook nastiness. It’s generally not difficult to convert the notebook code to scripts. You can automate the exporting of your notebooks’ source code from workspaces using the databricks CLI workspace export_dir command. This will recursively export the notebooks within the specified folder, into .py, .scala, .sql or .r files based on the notebook language of choice.
# export all files recursively to the destination folder.
databricks workspace export_dir /Shared/lib1 D:\tmp\shared\lib1
You will find certain cells using magics will need to be revisited, but if most of your code is based on the various Spark APIs this won’t play a big part.
From my experience of having worked on projects that are notebooks-based/heavy and on projects that are more IDE based, for me the IDE approach for data engineering is the way to go. When it comes to crafting code, a good ‘fat client’ IDE running on your workstation will make a massive difference, with all the responsiveness and functionality you need right there at your fingertips. Of course this is just my opinion on the matter.
We’ll be going through some of the most common aspects of developing on databricks throughout this series, so that you can see for yourself how to really get to grips with working on this fantastic platform. I hope this post has been of some use in deciding whether to opt for the IDE or remain with notebook-based development for your particular situation.
Thanks for reading and see you in the next post on Development on Databricks.
Today we’re launching a new series of posts here on Pivotal BI, this time around the subject of development on the amazing unified analytics platform that is databricks.
We’ll be focussing particularly on the practical aspects of ways of working, technical deep dives and the often unexplored elements that make the difference between short term ‘fly-by’ implementations and those more grounded longer term initiatives.
Right, without further ado we’ll dive in with the first post, looking at the differences between using notebooks and IDEs for development.
At Pivotal BI we do a lot of work on Microsoft Azure data solutions, so naturally being a Microsoft double Gold Partner in data fits well with what our clients ask for.

The world of data is one that is ever evolving, providing new ways of working in the analytics space accelerated by the rich and accessible cloud offerings that a platform like Azure makes available. Being part of the Microsoft Partner ecosystem is something that our clients find has huge benefits. Working closely with the provider of a broad range of integrated services that span the needs of the modern data-driven enterprise allows us to deliver above and beyond the expectations of our customers.
The change in attitudes towards Open Source Software marks a real revolution in thinking at Microsoft, and one that has potential benefits to customers across all business sectors. Leading analytical solutions such as Apache Spark and the Databricks platform provide a plethora of capabilities, from Streaming and Big Data Processing through to Data Ops savvy Machine Learning, that are transforming the way organisations compete in an ever changing marketplace.
We are proud to have achieved Microsoft double Gold Partner status, with competencies in Data Platform and Data Analytics, and to be playing a key part in enabling businesses to truly capitalise on their data assets. We look forward to an exciting future where cloud data platforms help provide greater opportunities for all organisations through improved insight and understanding.
To understand more around what we do and how we do it, please check out our services and capabilities, and how we work together with you to ensure success.
You can find more information on the services and technology that we partner on in data analytics, data management and modern data capabilities at our Microsoft Partner listing here.
To your next data journey,
The Pivotal BI Team.

In this final post in the series I thought it’d be useful to share some little tips and what may be thought of as tricks that I’ve come across when using Azure DevOps and Terraform. So without delay, in no particular order, here are those that are my favourites.
You may find yourself in the situation where you need to capture a Terraform resource configuration value to an Azure DevOps variable. This tends to be for using in a separate downstream task outside of Terraform.
Setting DevOps pipeline variables from within Terraform can be easily achieved using PowerShell and the local-exec provisioner. The following Terraform resource will capture the configuration values for you into DevOps variables.
resource "null_resource" "terraform-to-devops-vars" {

   triggers = {
        // always execute
        uuid_trigger = "${uuid()}"
   }

   provisioner "local-exec" {
    command = <<EOT
        Write-Host "##vso[task.setvariable variable=ServicePrincipleId]${azuread_service_principal.my_app.id}"
        Write-Host "##vso[task.setvariable variable=ServicePrinciplePassword]${azuread_service_principal_password.my_app.value}"
        EOT

    interpreter = ["PowerShell", "-Command"]
  }
}
The trigger will always fire, as it uses the uuid() function that will always generate a changed value.
If we leave things as they are, we will unfortunately expose our variables from within the DevOps outputs, such as the pipeline execution log, which for some values, such as secrets is going to create a security concern.
There is a native DevOps solution to this, and that is to use the IsSecret flag on the task.setvariable call, as below.
Write-Host "##vso[task.setvariable variable=DatabricksSecret;IsSecret=true]${azuread_service_principal_password.databricks.value}"
This will avoid any ‘leaky values’ and allow variables to capture Terraform values safely for use within the pipeline with no unwanted exposure.
Terraform does a great job of determining which resources have changed and need to be updated whenever a ‘Plan‘ or ‘Apply‘ action is made. There are times however when you will want to include other files in your Terraform configurations, such as when using a JSON file to store a REST payload for use in a script. In order to determine whether resources that use these files need to be included in the deployment, we can check against the MD5 hash of the file to see whether the file has changed. To redeploy the resource when the file has changed, we use a trigger that employs the filemd5() function, as below:
resource "null_resource" "exec_some_rest_with_payload_file" {
  triggers = {
    some_payload_changed                = "${filemd5("${path.module}\\..\\Payloads\\SomePayload.json")}"
  }

  provisioner "local-exec" {
    command = <<EOT
      .'${path.module}\..\Scripts\REST\ExecuteSomeRest.ps1' `
      -ApiRootUrl "https://${var.location}.${var.some_api_root_url_suffix}" `
      -SubscriptionId "${var.subscription_id}" `
      -TenantId "${var.tenant_id}" `
      -ApplicationId "${var.client_id}" `
      -Secret "${var.client_secret}" `
      -Payload ""${path.module}\..\Payloads\SomePayload.json"
      EOT

      interpreter = ["PowerShell", "-Command"]
    }
  }
This ensures that changes to related files used within our deployment are treated in a similar manner to changes to Terraform resource definitions. Nothing too clever this one of our tips and trick, and not really Azure DevOps-specific, just out-of-the-box Terraform native stuff. All the same something very useful that you may not be aware of.
This is one of the Terraform Azure DevOps tips and tricks that I find most useful. I’ve used it a lot when there are elements of API calls involved in the deployment. There are plenty of occasions where we find ourselves using scripts for elements of our deployment. Often we will supply a script with a JSON file or similar that contains a number of Terraform resource attributes for use in the script. A classic example of this is as with the above payload for a REST request body. These values may not be available however until deployment time, such as when needing resource module outputs that contain values generated at creation time, such as platform-specific unique ids. Hmmm, what’s a Terraformer to do?
A common technique often used with application or web .config files in the DotNet world is to use placeholder tokens in the config files and then replace these with the required configuration values that are passed in at deployment time. This ‘detokenising’ approach can be employed within Terraform as well. Here’s a simple example of a placeholder from such a file,
"some_platform_resource_id": "#{some_resource_id_as_output}#"
where here we have used ‘#{‘ and ‘}#’ characters to demarcate our placeholders.
We can replace the placeholder tokens in the file using a simple script such as the PowerShell shown below.
param(
    [string] $BaseFilePath,
    [string] $FileFilters,
    [PSCustomObject] $TokenValues
)


Function Update-FileTokens {
    param(
        [string] $BaseFilePath,
        [string] $FileFilters,
        [PSCustomObject] $TokenValues
    )
    <#
        .SYNOPSIS
        Updates placholder values in a group of files with their replacements.
        .DESCRIPTION
        Calls the Update-FileToken procedure for files at the base path included based on the names filters.
        .PARAMETER BaseFilePath
        The path from which to include files, including all subfolders
        .PARAMETER FileFilters
        A CSV string of the filters to apply to file names.
        .PARAMETER TokenValues
        A hashtable of tokens and the values to replace them with.
#>
    foreach ($filter in $FileFilters.Split(',')) {
        $fileNames = Get-ChildItem -Path $BaseFilePath -Recurse -Filter $filter | Select-Object FullName `

        foreach ($fileName in $fileNames) {
            Write-Host "Started replacing tokens in $($fileName.FullName)."
            Update-Tokens -FilePath $fileName.FullName -TokenValues $TokenValues
            Write-Host "Finished replacing tokens in $($fileName.FullName)."
        }
    }
}

Function Update-Tokens {
    param(
        [string] $FilePath,
        [PSCustomObject] $TokenValues
    )
    <#
        .SYNOPSIS
        Updates placholder token values in a group of files with their replacements.
        .DESCRIPTION
        Calls the Update-FileToken procedure for files at the base path included based on the names filters.
        .PARAMETER FilePath
        The path from of the file for token replacements
        .PARAMETER TokenValues
        A hashtable of tokens and the values to replace them with.
    #>
    $content = (Get-Content -Path $FilePath)

    $TokenValues.GetEnumerator() | ForEach-Object {
        $content = $content -replace $_.Key, $_.Value
    }

    Set-Content -Value $content -Path $FilePath
}

Update-FileTokens -BaseFilePath $BaseFilePath -FileFilters $FileFilters -TokenValues $TokenValues
We pass in a hash table object keyed on the placeholder tokens that we want to replace, such as ‘#{some_resource_id_as_output}#‘ above, with the values of the hash table entries being the replacements we want to substitute for. The above script will update the placeholders with their values in all files that match the BaseFilePath and FileFilters. Pretty straight-forward stuff.
In order to execute this within Terraform, with the required substitutions made at runtime, we can again use the local-exec provisioner with a PowerShell interpreter, constructing the hash table parameter from our resource attributes and variables and passing this in to the script call. The referencing of the module resource attributes will ensure that the replacements are triggered after these values have been made available so we don’t need any ‘depends_on’ clauses. The following resource snippet shows an example of these placeholders in action.
resource "null_resource" "update-file-tokens-payload-json" {
    triggers = {
        // always execute
        value = "${uuid() }"
    }

   provisioner "local-exec" {
       command = <<EOT
       .'${path.module}\..\scripts\util\Update-FileTokens.ps1' `
       -BaseFilePath '${path.module}\..' `
       -FileFilters '*.payload.json' `
       -TokenValues @{
            '#{some_config_from_var}#' = "${var.dbr_executable_storage_mount_name}"
            '#{some_resource_id_as_output}#' = "${azurerm_template_deployment.some-arm.some-id-as-output}"
            '#{some_config_from_secret}#' = "${var.some-secret-value}"
       }
       EOT

       interpreter = ["PowerShell", "-Command"]
   }
}
Once our required file has been processed using our Update-FileTokens.ps1 script, we can use the filemd5() trigger approach shown above to determine whether any resources that use this file need to be redeployed. If the file content has been changed by the detokenising, the resource will be redeployed as required.
Adopting this approach is very useful when using Rest API calls with JSON payloads for some elements of the Terraform deployment process. We can keep the payloads in their own JSON files, with any references to Terraform resource outputs and the like as placeholders,. Providing we call our Update-FileTokens.ps1 script before these JSON files are used we are able to treat these API calls like other resource definitions.
Thanks for reading. Quite a long one this time but I do hope the above Terraform and Azure DevOps tips and tricks prove to be of use to you Terraformers out there. Adding these strings to your bow may just help with those situations where Terraform doesn’t immediately offer up an obvious solution to realising your infrastructure management needs.
If you have any helpful techniques or simple tricks and tips to add or any questions on the above I’d love to hear about them in the comments below.
That winds up this series on Terraform on Azure. I’ve really enjoyed sharing my thoughts, opinions and experiences of this great combination of tooling that really empowers you on your Azure journeys. Over to you to stake your claim in the Cloud. May your deployments be idempotent, your Infrastructure as Code transparent and your solutions, well, just plain amazing.

In this article I’ll be going over how best to structure your Terraform resource code into modules. This draws on the practices outlined in the site https://www.terraform-best-practices.com and the accompanying GitHub at https://github.com/antonbabenko/terraform-best-practices. It is intended to act as a summary of that content together with some of my own observations and suggestions thrown in for good measure. Although not technically Azure related, it is a subject central to your best Infrastructure as Code endeavours with Terraform.
Structuring your resource code into modules makes them reusable and easily maintainable. I guess you could say it makes them, well, modular. You can find out all about modules from the Terraform docs at https://www.terraform.io/docs/modules/composition.html so I won’t go into them too much here.
Modules become particularly powerful when you start to publish them centrally. Terraform supports a number of repositories for these, such as file shares, GitHub, BitBucket and Terraform Registry. Users can then reference the repository modules for use within their own deployments.
How you determine what constitutes a module is really down to you. It will depend on how your deployments are structured and how you reuse resource definitions. Terraform recommend dividing into natural groupings such as networking, databases, virtual machines, etc. However you decide to chunk up your infrastructure deployment definitions, there are some guidelines on what to include.
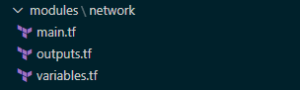
Each module is contained in its own folder and should contain a file for each of the following:
Some teams go a little further and split up certain resource types within the module, such as security or network resources, into their own separate .tf files to be used as well as main.tf. This may make sense where the module contains a large number of resources, and managing them in a single main.tf file becomes unwieldy.
In Object Oriented terms, you can loosely equate the variables to class method parameters required for the module. Similarly the Outputs are like the returns from methods and the main as the class itself. I’m sure there are plenty of purists that would point out floors in this comparison. However, conceptually it is good enough when thinking about how to encapsulate things (if you squint a bit). The variables and the outputs should form a sort of contract for use of the module. As such these definitions should try and remain relatively constant like the best library interfaces try to.
You can of course nest module folders within other module folders. However, generally speaking, it is not recommended to have very deep nested module hierarchies as this can make development difficult. Typically one level of modules, usually in a folder called ‘modules’ (again no prizes for originality here) is the accepted standard. You may of course opt for calling your folder ‘Bernard’, or ‘marzipan’ or whatever you like. Let’s face it though ‘modules’ is probably a lot more self-explanatory.
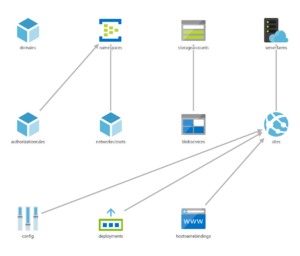
A basic module might look like the following:
With your modules nicely encapsulated for potential reuse and standards and all that loveliness, you need to make use of them. In your root module, being the top level entry point of your Terraform configuration code, you add references such as shown below:
module "sqldatabase-plan9" {
    source                    = "./modules/sqldatabase"

    resource_group_name             = "${azurerm_resource_group.martians.name}"

    sql_server_name                 = "${local.sql_server_alien_invasion}"
    sql_server_version              = "${var.sql_server_version}"
    ...
This then defines a resource using the module. Simply add your variable assignments that will be used within the module as required and you’re good to go.
Some teams like prefixes (mod-, m- etc.) on these files in order to distinguish them from resources that are standalone, single-file definitions (in turn perhaps prefixed res-, r-). I’m not a big fan of prefixing by subtypes (remember Hungarian Notation..?) as this tends to get in the way of writing code. For me, simple naming that aligns with other resource file naming makes more sense.
One area to be mindful of is to not introduce variables for every attribute of your module’s resources. If an attribute is not going to be subject to change then it won’t need a variable. Remembering the maintenance of your code is a key consideration of any good ‘Coding Citizen’. Too many variables will quickly overwhelm those not familiar.
There is of course a balance to be struck here. Too few variables and you can’t really reuse your module as it is too specific for others’ needs. It may make sense to have variations on modules that have various attributes preset for a specific workload. For example a certain Virtual Machine role type will ordinarily have a bunch of attributes that don’t differ. The standard advice of using your best judgement and a little forethought applies as with most things. Personally I’d rather work with two modules that are specific than one that is vague and requires supplying many more variables.
So that just about covers the main points I have to share on Terraform modules and resource code structure. I hope this has provided some insight and guidance of value based on my adventures in Terraform module land. They’re definitely worth getting familiar with early on to simplify and structure your efforts. As your organisation’s deployments grow, maturity in this area will soon pay off for all involved.
The last post in this series (I know, gutting right?) coming up soon will cover Tips and Tricks with Terraform and Azure DevOps that I’ve picked up on my travels. Thanks for reading and stay safe.
This article discusses the incorporation of Key Vault Secret values in Terraform modules and how they can be used as part of a release pipeline definition on Azure DevOps.
Secret management done right in Azure basically involves Key Vault. If you’re not familiar with this Azure offering, you can get the low-down at the following link:
https://docs.microsoft.com/en-us/azure/key-vault/
This article assumes you have followed best practice regarding securing your state file, as described in Terraform with Azure DevOps: Setup. Outputs relating to Secret values will be stored within the state file, so this is essential for maintaining confidentiality.
There are two key approaches to using Key Vault secrets within your Terraform deployments.
This involves using Terraform to retrieve the required Key Vault. One of the advantages of this method is that it avoids the need to create variables within Azure DevOps for use within the Terraform modules. This can save a lot of ‘to-ing and fro-ing’ between Terraform modules and the DevOps portal, leaving you to work solely with Terraform for the duration. It also has the advantage of being self-contained within Terraform, allowing for easier testing and portability.
We’ll assume you have created a Key Vault using the azurerm_key_vault resource type, added some secrets using the azurerm_key_vault_secret and set an azurerm_key_vault_access_policy for the required Users, Service Principals, Security Groups and/or Azure AD Applications.
If you don’t have the Key Vault and related Secrets available in the current Terraform modules that you are using, you will need to add a data source for these resources in order to reference these. This is typically the case if you have a previously deployed (perhaps centrally controlled) Key Vault and Secrets.
Setting up the Key Vault data source in the same Azure AD tenant is simply a matter of supplying the Key Vault name and Resource Group. Once this is done you can access various outputs such as Vault URI although in practice you’ll only really need the id attribute to refer to in Secret data sources.
data "azurerm_key_vault" "otherworld-visitors" {
  name                = "ET-and-friends"
  resource_group_name = "central-rg-01"
}

output "vault_uri" {
  value = data.azurerm_key_vault.central.vault_uri
}
I’ll leave you to browse the official definition for the azurerm_key_vault data source for further information on outputs.
Create Key Vault Secret data sources for each of the secrets you require.
data "azurerm_key_vault_secret" "ufo-admin-login-password" {
  name         = "area-51-admin-password"
  key_vault_id = data.azurerm_key_vault.otherworld-visitors.id
}

output "secret_value" {
  value = data.azurerm_key_vault_secret.ufo-admin-login-password.value
}
There are again a number of outputs for the data source, including the Secret value, version and id attributes.
You can then reference the Secret’s value by using the respective Key Vault Secret data source value attribute wherever your module attributes require it.
resource "azurerm_sql_database" "area-51-db" {
  name                         = "LittleGreenPeople"
  administrator_login_password = "${data.azurerm_key_vault_secret.ufo-admin-login-password.value}"
  ....
}
If you are using a centralised variables file within each module, which aligns with recommended best practice, this means only having to change the one file when introducing new secrets. Our variables file simply references the required Key Vault Secret data sources as below,
ufo_admin_login_password = "${data.azurerm_key_vault_secret.ufo-admin-login-password.value}"
and our module resource includes the variable reference.
resource "azurerm_sql_database" "area-51-db" {
 name = "LittleGreenPeople"
 administrator_login_password = "${var.ufo_admin_login_password}"
 ....
}
As previously mentioned this has not involved any Azure DevOps elements and the Terraform won’t require additional input variables in order to work with the Key Vault Secrets.
The second approach uses a combination of DevOps variable groups and Terraform functionality to achieve the same end result.
The first step is to grab our secrets into DevOps variables for use within the pipeline. Variable groups can be linked to a Key Vault as below.

This then allows the mapping of Secrets to DevOps variables for use within the various tasks of our pipelines.
I’ll demonstrate two ways to work with these variables within our Terraform modules. I’m sure there are others of course, but these are ones that I’ve found simplest for DevOps – Terraform integration.
The Replace Tokens task can be used to to replace delimited placeholders with secret values stored in variables. This does of course require that you adopt a standard for your placeholders that can be used across your modules. This approach can result in code that is disjointed to read, but is a common practice with artifacts such as app.config files in the DotNet world. The advantage of this is that you can take a single approach to Secret substitution. We can use Token replacement for both of these areas your code, be it Terraform IaC or DotNet.
The other technique I mention here is the use of the inbuilt support for variables with names that are prefixed ‘TF_VAR_’. Any environment variables with this naming convention will be mapped by design to Terraform variables within your modules. More information from Terraform docs is available at https://www.terraform.io/docs/commands/environment-variables.html.
We can pass DevOps variables that have been populated with Secrets values into the Terraform task as Environment Variables. You can then use standard variable substitution within your modules. So, ‘TF_VAR_my_secret’ will substitute for the ‘my_secret’ Terraform variable. Please note that all DevOps variables containing secret values should be marked as sensitive. This then obfuscates the variable values within the DevOps log.
Terraform and Azure DevOps allow more than one method for building pipelines that require secrets stored within Key Vault. For me, the Terraform ‘native’ approach of using Key Vault and Key Vault secrets data sources via the Azure RM Terraform provider is the simplest approach. There is no overhead of managing DevOps variables involved which keeps things nicely contained. You may of course prefer alternatives such as those others shown above or have another method, which I’d love to hear about.
I hope this post has provided some insight into using Terraform within Azure DevOps. These two technologies are a winning combination in address real-world Infrastructure as Code adoption within your organisation.
In the final post of this series I’ll be looking at best practices for managing your code using Terraform Modules.
Pivotal BI are an approved Crown Commercial Service Supplier on the G-Cloud framework.
Being accepted within the G-Cloud framework means that we are authorised to provide cloud data analytics and related services to the following organisations:
Our level of expertise in delivering data analytics and business intelligence solutions provides exceptional value for those looking to leverage all that the cloud has to offer in this exciting and increasingly essential space.
As double Microsoft Gold Partners we are well positioned to advise on all elements of a successful Azure cloud delivery from inception to operation and beyond.
To understand more around what we do and how we do it, please check out our services and capabilities, and how we work together with you to ensure success.
You can find more information on the great range of services that we provide around data analytics, data management and modern data capabilities at our Crown Commercial Service Supplier G-Cloud listing below:
https://www.digitalmarketplace.service.gov.uk/g-cloud/services/776846316335066
We think you’ll agree that these services will help speed your journey to reaching even greater modern data capabilities.
We look forward to hearing from you soon.
Take care,
The Pivotal BI Team
This post discusses some initial tasks when starting to use Terraform for your CI/CD workflow with Azure DevOps.
The Terraform state file contains all information regarding the deployment of the resources to the target environment. This can include sensitive information such as storage keys and other secrets that may be output from Terraform. If you are working in a team environment, you will want to store this file where it can be used by the team, the obvious choice if you are working in Azure being a storage account. When running your Terraform deployments with Azure DevOps the only user account that should have access permissions granted to this storage account is that under which the DevOps release pipelines are being executed. It is critical to the security of your deployments to ensure this is in place before proceeding with Terraform as your resource management solution. You can find a great tutorial from Microsoft which walks you through setting this up at the following link.
https://docs.microsoft.com/en-gb/azure/terraform/terraform-backend
For those already established in Azure, it is likely that some of your resources will not be part of your IaC code base, for whatever reason. In order to complete the picture for future deployment efforts you’ll want to bring these into Terraform resource definitions and ensure that the state file reflects the correct picture. Fail to do this and Terraform will tear them down seeing them as undesired leftovers from previous deployment efforts. One area where Terraform lags significantly behind ARM Templates is in creating infrastructure definitions from existing resources.
With ARM, the majority of deployed resources within Azure can be exported from the portal to a template file which you can then amend, further parameterise if needed and store within your IaC repository.
Terraform’s ‘import’ command does allow something similar in spirit but which requires a lot more manual work in order to reach the same result. You can read about this here.
https://www.terraform.io/docs/import/index.html
Let’s take a look at what we need to bring a resource under Terraform control.
In order to bring the resource in, we need to create a resource definition for the desired resource, which can be simply of the form <resourceType>.<resourceName>, e.g.
resource "azurerm_storage_account" "datalake-storage" {

}
Pretty straight forward.
With our skeleton resource definition in place, running Terraform’s import command will populate the state file with the required resource attributes from the deployed resource. With our above resource we would execute the following, where the resource_id is the desired Azure resource id.
terraform import azurerm_storage_account.datalake-storage /subscriptions/<subscriptionId>/resourceGroups/<myresourcegroup>/providers/Microsoft.Storage/storageAccounts/<myaccount>
Okay, so now our state file reflects the resource we have imported. Terraform is now aware of its existence and won’t squish it like an unnoticed cherry tomato that strayed out of the fridge.
With the required information in the state file, we then need to extract the required information. This can be done by the Terraform show command, as below:
terraform show -json
This will output the state file information in JSON format, giving you the information required for the definition.
Next comes the not so fun bit. At present there is no means to auto-populate the definition from the state info. This leaves a manual exercise to update the resource definition file to complete the Terraform definition. You’ll need to refer to the Terraform Azure resource definition attribute documentation as you go for this. This may take a while if you have a number of resources. There are thankfully plans to automatically populate the resource definition file as part of the import.
Due to Terraform’s state file centric view of the world, it will be blissfully unaware of any operations undertaken outside of its deployments. When using the IaC approach to resource deployment with Terraform this is something that shouldn’t really happen but sometimes things can slip through. This issue of ‘state drift’ is something that we can however correct for with the ‘Terraform refresh’ command, as described here.
https://www.terraform.io/docs/commands/refresh.html
Terraform refresh will amend resource definitions stored in the state file. The state file must exist as the refresh command is not able to recreate the file itself completely. Again, as there is no auto-populating of the resource definitions, you’ll need to use Terraform show to extract the resource information and another manual update to align things.
Setting up Terraform on Azure for DevOps is something that will really get you on the right CI/CD path to Azure estate IaC management. Bringing existing resources into the Terraform fold is not straight forward and you should plan a reasonable amount of time for it, though this will change in a future release. Once in, you’ll really start to see it paying dividends for all your DevOps activities. You may even start to wonder how you previously got by without it. In the final posts in this series we’ll be looking at integration with Release Pipelines, Secrets management and some other usability tips and tricks. See you soon for more Terraforming.
Terraform has some great support for Azure resources but there are some situations where you will need to fall back to calling ARM Templates for your resource deployments. In general this is when the Terraform Azure provider simply does not have a definition for the resource required. Some complex deployments within Azure are made available via ARM templates, such as when deploying an Azure Databricks workspace that has dependent VNet and public/private subnets. Doing this level of deployment from scratch is not for the feint-hearted and would probably not go smoothly straight off the bat on the first attempt. I guess that is why Azure came up with ARM Templates in the first place.
As those familiar with Terraform will know, the state of deployed resources and related attributes is tracked in the ‘state file’. This file, with the extension .tfstate, is the go-to de facto picture of what is deployed, and anything not contained within that state file simply doesn’t exist as far as Terraform is concerned.
When a resource is removed from the Terraform module definitions, upon issuing a Terraform Apply to redeploy the latest view of the infrastructure, the resource is torn down from Azure. Based on the dependency graph known to Terraform, the resources no longer required are gracefully deleted from the respective resource group(s). There are however a number of instances when the information in the state file does not provide what is required to manage this tear down process.
Null resources, by their nature do not actually tie into any actual resource that Terraform will recognise, and so any removing of related resources will need to be explicitly managed via additional script execution to back out the original deployed resources. Although something of a pain, it is taken as a given when adopting this approach to resource management.
ARM Templates will contain a reference in the state file to the actual template deployment but this has no information on what the template actually deployed. It is simply a reference to the Azure provider ARM Template resource.
You can find information about the Azure Resource Manager Template Deployment Terraform resource at:
https://www.terraform.io/docs/providers/azurerm/r/template_deployment.html
As mentioned, unless you want to tear down everything that is not in the template, you will want to use the ‘Incremental’ deployment mode for the template.
    parameters = {
       ...
    }
    deployment_mode = "Incremental"
}
In order to manage our resources created using Terraform and ARM Templates, we’re going to need some way of removing these resources when no longer required.
One recommended approach is to simply deploy all resources to a separate resource group, which can then be deleted, along with all contained resources. For any but the simplest of deployments however this is not really going to be desirable.
Terraform allows conditional statements within resource definitions that are based on the action being undertaken by Terraform. This allows us to run custom scripts that can explicitly tear down the resources that were deployed once we no longer want this ARM Template deployment, by specifying the related condition as ‘destroy’. These are then executed when we explicitly action ‘Terraform destroy’. If you only want to target the ARM Template Terraform resource for the destroy action, this should be specified using the ‘-target’ argument of the destroy command. Failure to specify this will result in all resources within the module definitions being torn down (probably not the desired effect).
In order to know what resources to remove, the respective ids of the resources contained within the ARM Template will need to be captured as outputs from the ARM Template Terraform deployment. These will be referenced in the explicit Azure resource delete statements executed.
There is a bug in older Terraform versions with using ARM Template outputs. They will not see the output definition on the initial Terraform Plan action, which will cause the plan to fail. In order to overcome this, you need to run a deployment with the ARM Template output defined but no references to it in the Terraform. This which will update the state file accordingly. The ARM Template output can then be successfully referenced from this point forward in your Terraform resources.
To formalise the above, in order to destroy resources that are deployed via ARM Templates with Terraform, the following is required:
Putting this all together we have our ARM Template outputs (I’ve only included the one here for brevity),
{
  "$schema": "https://schema.management.azure.com/schemas/2015-01-01/deploymentTemplate.json#",
  "contentVersion": "1.0.0.0",
  "parameters": {
  ...
  ...
  ...
        }
      },
      "type": "Microsoft.Databricks/workspaces"
    }],
  "outputs": {
    "resourceID": {
      "type": "string",
      "value": "[resourceId('Microsoft.Databricks/workspaces', parameters('workspaceName'))]"
    }
  }
}
the deletion script elements within the Terraform resource definition for the ARM Template (I’ve used az commands but of course you can use PowerShell if you prefer),
resource "azurerm_template_deployment" "dbr-wsp-dataeng" {
  name                = "${var.organisation}-${var.system}-${var.environment}-${var.dbr_workspace_name_prefix}-${var.dbr_name_prefix}-wsp-${var.location}"
  resource_group_name = "${azurerm_resource_group.datalake.name}"

  template_body = <<DEPLOY
  ${file("${path.module}/databricks-workspace.json")}
  DEPLOY

  # these key-value pairs are passed into the ARM Template's `parameters` block
  parameters = {
      ...
      ...
  }

  deployment_mode = "Incremental"
    provisioner "local-exec" {
        when = "destroy"
        command = "az login --service-principal -u ${var.clientId} -p ${var.clientPwd} --tenant ${var.tenantId} && az resource delete --ids ${self.outputs.resourceID}"
    }
}
and the destroy action targeting only the Terraform resource desired for removal.
Terraform destroy -target azurerm_template_deployment.dbr-wsp-dataeng
This approach does require that we capture all the required outputs and deletion commands in order to clear up the ARM Template deployment. This will require inspection of the ARM Template specifics to ensure all items are covered. It does however offer the granularity more often required for selective resource tear down that is not an option for the resource group level deletion approach. For me, gaining this desired level of control over resource management when falling back to ARM Templates makes the extra effort well worth it.
In order to determine the respective order of resource deployments and how it all fits together, we need to understand the dependencies that exist within our resources. This is a particular area of potential maintenance and complexity for our Infrastructure as Code (IaC) best efforts as we amend our deployment requirements over time. In this post we’ll look at how ARM templates and Terraform deal with the gnarly aspect of dependencies within resource deployments.
The ‘reference’ function can be used to reference properties from one resource for use within another. For example
"properties": {
        "originHostHeader": "[reference(variables('webAppName')).hostNames[0]]",
        ...
    }
The referenced resource must be a name of a resource defined within the same template. This creates an implicit dependency on the other resource. Passing Resource ID values in will not create an implicit dependency as ARM will not be able to interpret this.
The use of these within you template, as described at https://docs.microsoft.com/en-us/azure/azure-resource-manager/templates/template-functions-resource#list will also create an implicit dependency.
When calling a linked/nested template, ARM will create an implicit dependency on the deployment that is defined within the linked template, essentially conducting the linked deployment first. This is an ‘all or nothing’ dependency, with no ability to define more granular resource dependencies across templates.
For all those resources that are defined within the same template that do not use ‘reference’ or ‘List*’ functions, ARM defines dependencies between resources explicitly using the ‘dependsOn’ attribute. An example of the use of the ‘dependsOn’ attribute is given below.
{
  "type": "Microsoft.Compute/virtualMachineScaleSets",
  "name": "[variables('namingInfix')]",
  "location": "[variables('location')]",
  "apiVersion": "2016-03-30",
  "tags": {
    "displayName": "VMScaleSet"
  },
  "dependsOn": [
    "[variables('loadBalancerName')]",
    "[variables('virtualNetworkName')]",
    "storageLoop",
  ],
It is not possible to define dependencies across different templates in this manner. Managing these dependencies within each template is an element of the deployment definition that will need attention and can easily result in failed deployments when items are missed. This can add a considerable overhead to our efforts to get things managed via IaC for those deployments that have many resources.
For all resources defined within the Terraform modules, both root modules and any referenced, Terraform will determine the dependencies and execute the resource management actions as needed. There is no need for explicitly declaring dependencies between resources, and as items are added/removed, so dependencies are adjusted as needed. When one resource depends on another it will be apparent from any referenced resource ids. This is essentially the same behaviour as for the ARM template ‘reference’ function, with the main advantage of Terraform being that these referenced resources can exist within separate modules/files.
One area where dependencies will need to be explicitly defined is where Terraform resource providers cannot be used for all resource aspects of the deployment required. Two common instances of this within Azure are:
Terraform will be unaware of the resources actually deployed within an ARM template and as such will not be able to determine which other resources may depend on these. Likewise, actions undertaken within scripts and other executables will also present no known resource dependencies for Terraform to consider. In both these scenarios we need to state what our dependencies will be.
Terraform allows the explicit defining of dependencies using the ‘depends_on’ attribute for a resource. In the example below, the dependency resources must all be deployed prior to this resource.
resource "null_resource" "exec_notebook_job_mount_workspace_storage_checkpointing" {
    depends_on = {
        null_resource.create_databricks_data_eng_cluster,
        null_resource.add_workspace_notebook_storage_mount,
        azurerm_storage_container.datalake
    }
Terraform provides a ‘Null Resource’ for arbitrary actions, being basically a resource definition for a non-existent resource. The ‘local-exec’ provisioner within this allows for the execution of various script types such as PowerShell, Bash or Cmd. ‘Triggers’ control the point at which this can be executed that define one or more prerequisite resources which must undergo change in order for the execution to take place. Using this approach we can execute any script or executable at a set point within the deployment. Note that these triggers act as logical ‘Or’ rather than ‘And’ triggers, so the resolution of any one of their resource conditions will allow the execution of the null resource.
resource "null_resource" "exec_notebook_job_mount_workspace_storage_checkpointing" {
    depends_on = {
        null_resource.create_databricks_data_eng_cluster,
        null_resource.add_workspace_notebook_storage_mount,
        azurerm_storage_container.datalake
    }
    triggers = {
        create_databricks_data_eng_cluster = "${null_resource.create_databricks_data_eng_cluster.id}_${uuid()}"
        add_workspace_notebook_workspace_storage = "${null_resource.add_workspace_notebook_storage_mount.id}_${uuid()}"
        datalake_storage = "${azurerm_storage_container.datalake.id}_${uuid()}"
    }
    provisioner "local-exec" {
Note that there are multiple triggers that could set this resource to execute the respective script. All three of the related resources must however be deployed prior to executing the script, due to internal dependencies that the script has on these resources. As such we have used the depends_on block to ensure that all is in place beforehand.
Terraform makes dependencies a lot simpler to define than ARM templates. The combination of implicit dependency detection plus explicit definition where required allows for much easier definition of resource deployments. Being able to implicitly determine dependencies across files with Terraform also provides for less ‘structural constraints’ when writing the IaC definitions. This results in increased productivity and reduced management overhead. Administrators need think less about the order of deployment and can get on with defining the infrastructure, leaving the rest for Terraform.


