Alias Azure Analysis Services using Proxies in Azure Functions
Introduction
This post details how to alias Azure Analysis Services using proxies in Azure Functions. A cost-effective, flexible and codeless solution to manage link:// protocol redirects for Azure Analysis Services.
Let’s have a quick recap of the aliasing functionality in Azure Analysis Services before we dive into the implementation detail for this solution.
Connecting to Azure Analysis Services from Power BI Desktop, Excel and other client applications requires end users to specify the Analysis Services server name. For example, when connecting to a server called myanalysisservices, in the UK South region, you would use the address: asazure://uksouth.asazure.windows.net/myanalysisservices. As you can see, it’s a fairly unwieldy and hard to remember approach for connecting to the server from client tools.
An alternate approach is to use a shorter server alias, defined using the link:// protocol e.g. link://<myfriendlyname>. The endpoint defined by the shorter server alias simply returns the real Analysis Services server name in order to allow for connectivity from the client tools. A shorter server alias will (amongst other benefits):
- Provide end users with a friendly name for connecting to the Azure Analysis Services server
- Ease the migration of tabular models between servers by removing any impact on end users and removing the need for large amounts of manual updates to client tool content post migration e.g. changing the datasource in all Power BI reports and Excel connected workbooks
Any HTTPS endpoint that returns a valid Azure Analysis Services server name can provide the aliasing capability. The endpoint must support HTTPS over port 443 and the port must not be specified in the URI.
Additional information on aliasing Azure Analysis Services can be found in the following Microsoft documentation: https://docs.microsoft.com/en-us/azure/analysis-services/analysis-services-server-alias.
Implementation Overview
Components
Implement aliasing for Azure Analysis Services by deploying and configuring the following components:
- CNAME DNS record – Provides your end users with a friendly server name for Analysis Services
- Azure Function App with proxy capabilities – Passes the Analysis Services server name to the client tools
The CNAME destination will be configured to point to the Azure Function App. The Azure Function App will be configured with a proxy entry to serve up the connection information for the Azure Analysis Services server.

Alias multiple servers using one CNAME record by configuring the destination Azure Function App with multiple proxy entries. Each of these proxy entries must be configured with a different route template e.g. link://<myCNAME>/<myProxyEntryRouteTemplate>. Please see implementation detail below for additional information.

Implementation steps
Deploy Azure Analysis Services aliasing by following the steps below (covered in detail later in this post):
- Provision an Azure Function App
- Create a CNAME record for the Azure Function App
- Add the CNAME record to the Azure Function App
- Create proxy entries for each Azure Analysis Services server
Costs
1million executions per month and 400K GB-s worth of resource consumption are provided free as part of the Azure Functions Consumption Pricing Plan. Aliasing provided by the proxy service should fall well within the minimum execution time (100ms) and memory consumption (128MB) thresholds of this price plan. This should put you at < 125K GB-s of resource consumption over 1million executions. After this, charges are £0.15 per 1 million executions (assuming the minimum resource consumption of 100ms runtime @ 128MB memory consumption).
There are alternative pricing plans available, detailed information on Azure Functions pricing can be found here: https://azure.microsoft.com/en-gb/pricing/details/functions/
Implementation Detail
Provision an Azure Function App
- Login to https://portal.azure.com
- Click on Create a resource
- Search for and select Function App
- Click on Create
- Complete the necessary fields on the new Function App blade to create a new Azure Function App.
Take note of the app name for the Azure Function App as you’ll need to use this when creating the CNAME record.

Please note that the name/URL of the Azure Function App is not the HTTPS endpoint which will be used as the alias by your end users. Feel free to name the Azure Funtion App in accordance with your naming conventions as the CNAME record will be used for friendly naming.
It is possible to configure delegated administration, for managing the Azure Function App proxy capability, by assigning the Website Contributor role on the Azure Function App access control list.
Create a new CNAME record for the Azure Function App
Create a new CNAME record with your domain service provider and set the destination for the record to the URL of the newly created Function e.g. myaliashandler.azurewebsites.net
Add the CNAME record to the Azure Function App
- Login to https://portal.azure.com
- Open the Azure Functions blade
- Load the blade for the newly created Azure Function App resource
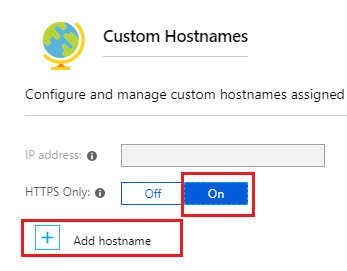
- Click on Platform Features > Custom Domains

-
- Click on Add Hostname
- Add the new hostname
- Click on Validate
- Once validated click on Add Hostname
- Add the SSL Binding by clicking on Add Binding next to the new hostname
- Select the relevant private certificate and click on Add Binding
Upload a private certificate to manage the SSL binding for the new hostname
- Load the blade for the newly created Azure Function App resource
- Click on Platform Features > SSL
- Choose the menu option, Private Certificate > Upload Certificate to upload your private certificate
- Load the blade for the newly created Azure Function App resource
- Click on Platform Features > Custom Domains
- Add the SSL Binding by clicking on Add Binding next to the new hostname
- Select the relevant private certificate and click on Add Binding
Create an alias entry for Azure Analysis Services on the Azure Function App
- Login to https://portal.azure.com
- Open the Functions App blade
- Click on the newly created Azure Function App resource
- Select the + symbol next to Proxies
Name: Add a meaningful name for the proxy
Route template: The path which will invoke this proxy entry
Allowed HTTP methods: GET
Set the following under Response Override
Status code: 200
Status message: accept
Under Headers:
Content-Type: text/plain
Body: The address to the Azure Analysis Services server e.g. asazure://<region>.asazure.windows.net/<server>

- On completion click create
You’ve now successfully configured an alias for your Azure Analysis Services server.
Testing
Azure Function App testing can be carried out in a web browser by connecting to: https://<myFunctionApp>/<myRouteTemplate> e.g. https://myaliashandler.azurewebsites.net/finance. The fully qualified Analysis Services server name should appear in the web browser.
Further testing can be conducted using the CNAME entry, in your web browser try connecting to https://<myCNAME.myDomain.com>/<myRouteTemplate> e.g. https://data.mydomain.com/finance
Finally, from within a client tool which supports the link protocol, connect using link://myCNAME.myDomain.com/<myRouteTemplate> e.g. link://data.mydomain.com/finance
Further Reading
https://docs.microsoft.com/en-us/azure/azure-functions/functions-proxies
https://docs.microsoft.com/en-us/azure/analysis-services/analysis-services-server-alias


